Logging in Python is a crucial aspect of application debugging and development. It offers a systematic way of collecting and storing valuable information during the execution of the program. With logging, you can effectively track events, identify issues, and observe insights into the behavior of their Python applications.
Today’s guide will show you the techniques related to logging in Python in various formats.
What is Logging in Python
In Python, logging is a procedure used for recording the log message during the program execution. It permits developers to capture important information, errors, warnings, and other events that can be encountered while the program is running.
These log messages can then be stored in several destinations like, files, consoles, or external services, offering valuable insights for debugging, monitoring, and analysis.
What are the Python Logging Levels
Python logging modules can have different levels with specific purposes, such as.
- DEBUG – Extensive information for debugging purposes.
- INFO – General information regarding the execution of the programming.
- WARNING – Represent the unexpected behavior or potential issues that don’t restrict the program from running.
- ERROR – Error that has been encountered, but the program can still continue.
- CRITICAL – Result in program termination.
Create a Logger in Python
In order to create a logger in Python, follow the stated syntax:
import logging

logger = logging.getLogger(__name__)
First of all, import the “logging” module. Then, create a logger object using the “getLogger()” function. Here the “__name__” parameter indicates the current module or script name. However, you can replace “__name” with the required logger name.
Console Logging in Python
In Python, console logging refers to the approach of displaying the log message on the terminal or console. It includes configuring a “StreamHandler” for displaying the records to the console.
This permits the developers to view the log messages directly in the command-line interface during the execution of their Python program.
Set up Console Logging in Python
Now, we will set up console logging by first importing the “logging” module and then creating a logger object. After that, we will add a console handler to it. This handle will be created using the “logging.StreamHandler()” method that directs logs messages to the console.
After that, the logger will log a warning message using the “logger.warning()” method which will be shown on the console.
import logging

logger = logging.getLogger(__name__)
console_handler = logging.StreamHandler()
logger.addHandler(console_handler)

logger.warning("This is a warning message")

Format Log Messages for Console Output
Now, let’s continue the same example and add a formatter to the console handler. To do so, a formatter is created using the “logging.Formatter()” method.
This method defines a particular format for log messages, which also includes log-level messages.
Next, the formatter is created by utilizing the “console_handler.setFormatter()“. As a result, the error message will be logged by invoking the “logger.error()” and the formatted message will be shown on the console.
import logging

logger = logging.getLogger(__name__)
console_handler = logging.StreamHandler()
console_formatter = logging.Formatter("%(levelname)s - %(message)s")
console_handler.setFormatter(console_formatter)
logger.addHandler(console_handler)

logger.error("An error occurred")

File Logging in Python
Using file logging, you can write messages to a file instead of displaying them on the console. It typically comprises a “FileHandler” for defining the file format and locations. This helps you to store information in a more persistent manner.
Configuring File Logging
In order to configure file logging, first, create a logger object and add a file handler to it with the help of the “logging.FileHandler()“. This file handler defines the log file name, which is “app.log“, in our scenario.
After that, the logger then logs an informational message using the”logger.info()” and the message will be written to the mentioned log file.
import logging

logger = logging.getLogger(__name__)
file_handler = logging.FileHandler("app.log")
logger.addHandler(file_handler)

logger.info("This is an informational message")

Specify Log File Location and Format
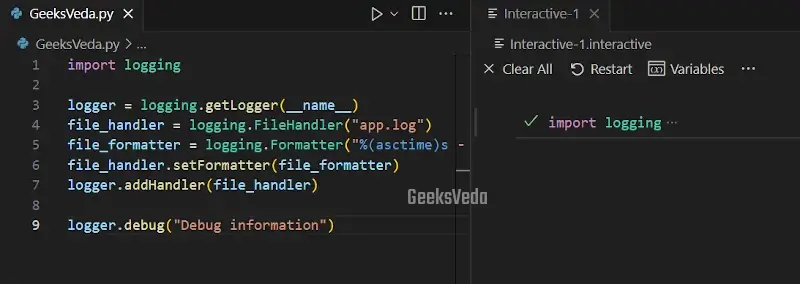
Now, in the same example, let’s add a formatter to the file handling for defining the format of the log messages written to the log file. You can create the formatter with the “logging.Formatter()” method and then specify a format that comprises timestamp, log level, and log message.
The formatter is set on the file handler using the “file_handler.setFormatter()“. Lastly, a debug message will be logged by invoking the “logger.debug()” method and the formatted message will be written to the log file.
import logging

logger = logging.getLogger(__name__)
file_handler = logging.FileHandler("app.log")
file_formatter = logging.Formatter("%(asctime)s - %(levelname)s - %(message)s")
file_handler.setFormatter(file_formatter)
logger.addHandler(file_handler)

logger.debug("Debug information")
Rotating File Logging in Python
Rotating file logging is an approach utilized for managing log files by automatically rotating them based on time or size. It includes configuring a “RotatingFileHandler” for creating new log files when the current file crosses a particular size or reaches the defined time interval.
Set up Rotating File Logging in Python
In this example, we will demonstrate the concept of a rotating file handler, which permits log files to be rotated based on size or time. The given program first creates a logger object and adds a rotating file handler to it with the help of the “logging.handlers.RotatingFileHandler()“.
The log file is mentioned as “app.log” and the “maxBytes” parameter has been set to “1024” to limit the file size. In the end, the logger outputs a message by invoking the “logger.critical()” method, and that particular message will be written to the log file.
import logging
from logging.handlers import RotatingFileHandler

logger = logging.getLogger(__name__)
file_handler = RotatingFileHandler("app.log", maxBytes=1024, backupCount=5)
logger.addHandler(file_handler)

logger.critical("A critical error occurred")

Manage Log File Rotation
Now, let’s expand on the same example for managing the log file rotation. To do so, add a for loop where log messages are generated with the help of the “logger.info()“.
As the loop progresses, the file will exceed the mentioned size limit, which ultimately triggers the log file rotation and the creation of the backup files.
import logging
from logging.handlers import RotatingFileHandler

logger = logging.getLogger(__name__)
file_handler = RotatingFileHandler("app.log", maxBytes=1024, backupCount=5)
logger.addHandler(file_handler)

for i in range(10):
    logger.info("This is log message {}".format(i))

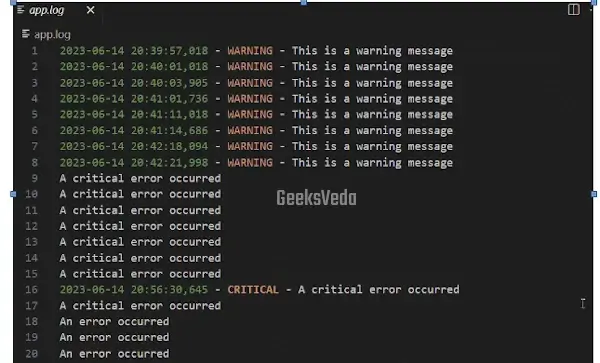
Here is what has been saved in the “app.log” file till now.
Log Formatting in Python
Customizing the structure and appearance of the log message is known as log formatting. It includes configuring the logging formatter with particular formatting options, like including the timestamps, module names, log levels, or customized log message formats. This makes the messages more informative and readable.
Customize Log Message Formats
The provided program demonstrates the procedure to customize the format of log messages. For the corresponding purpose, we will create a logger object and add a console handler to it.
Then, a formatter is created using the “logging.Formatter()” to specify the format for log messages. The formatter comprises the timestamp, log level, and the log message.
After that, the formatter is set on the console with “console_handler.setFormatter()“. Lastly, an informational message has been logged to the console and the formatted message has been shown.
import logging

logger = logging.getLogger(__name__)
console_handler = logging.StreamHandler()
formatter = logging.Formatter("[%(asctime)s] %(levelname)s - %(message)s")
console_handler.setFormatter(formatter)
logger.addHandler(console_handler)

logger.info("This is an informational message")

Add Timestamps and Other Relevant Information
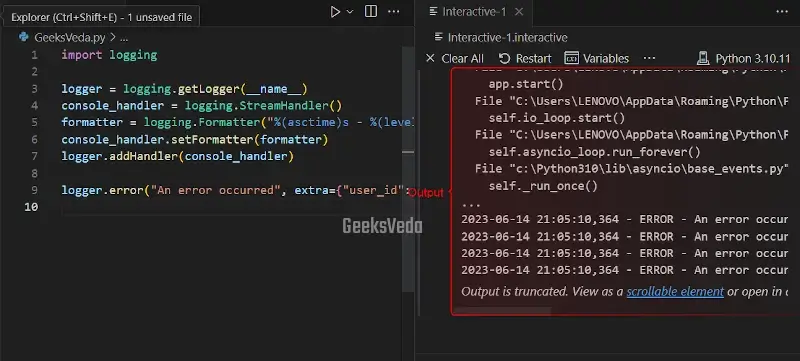
In the ongoing example, let’s add the “logger.error()” method and the formatted string. This string includes the timestamp, log level, and provides extra information such as the “user_id“.
import logging

logger = logging.getLogger(__name__)
console_handler = logging.StreamHandler()
formatter = logging.Formatter("%(asctime)s - %(levelname)s - %(message)s")
console_handler.setFormatter(formatter)
logger.addHandler(console_handler)

logger.error("An error occurred", extra={"user_id": 123})
Logging Exceptions in Python
Logging exceptions include capturing and logging exceptions that can be encountered during the execution of the program. This can be done with the “logger.exception()” method that assists in locating the cause and location of the exception.
Catch and Log Exceptions in Python
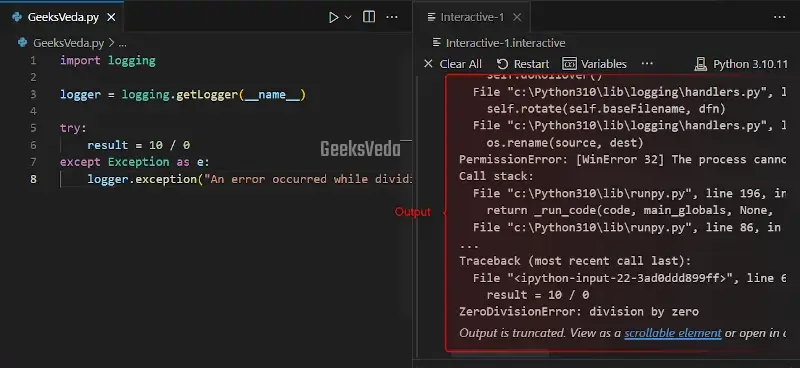
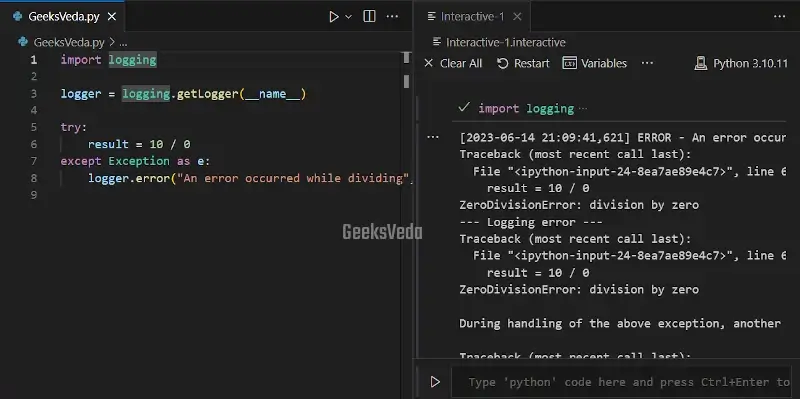
In order to catch and log exceptions, create a logger object and catch the relevant exception with the “try_except” block. Within the exception block, the “logger.exception()” method has been invoked for logging the exception with the given message.
esc_info=True” argument makes sure that the exception’s stack trace is included in the log message.
import logging

logger = logging.getLogger(__name__)

try:
    result = 10 / 0
except Exception as e:
    logger.exception("An error occurred while dividing", exc_info=True)
Include Stack Traces in Log Messages
Now, in the same example, the “logger.error()” method is invoked for logging the exception with the specified message, and the “exc_info=True” argument will include the stack trace in the log message.
import logging

logger = logging.getLogger(__name__)

try:
    result = 10 / 0
except Exception as e:
    logger.error("An error occurred while dividing", exc_info=True)
Logging to Multiple Destinations in Python
By logging to multiple destinations in Python, you can send log messages to multiple handlers at the same time. This enables you to configure their logging system for displaying the log to several destinations, like the log file, or console.
Send Logs to Multiple Handlers
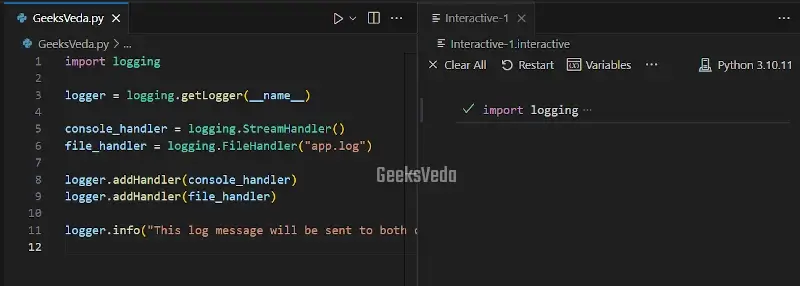
For the purpose of sending log messages to multiple handlers at the same time, create a logger object and then add both a file handler and a console handler to it.
After that, the logger outputs an informational message with the “logger.info()” method and that specified message will be also sent to the mentioned “app.log” file.
import logging

logger = logging.getLogger(__name__)

console_handler = logging.StreamHandler()
file_handler = logging.FileHandler("app.log")

logger.addHandler(console_handler)
logger.addHandler(file_handler)

logger.info("This log message will be sent to both console and file")
Add Contextual Information to Log Records
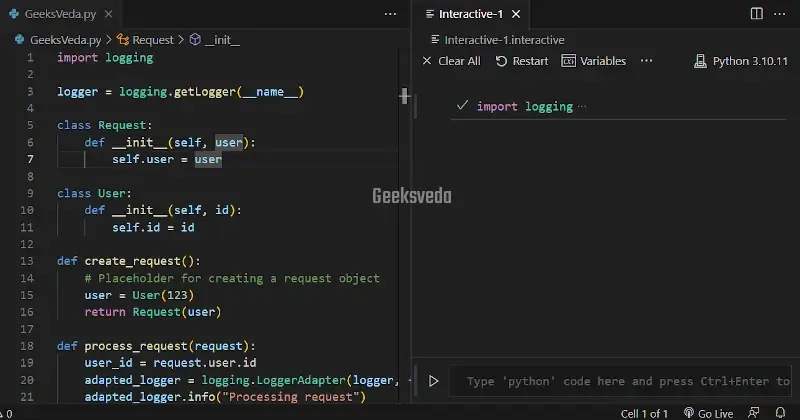
In order to add contextual information to log records, first define a “Request” class and a “User” class.
After that, the “create_request()” function creates a request object and the “process_request()” function extracts the User ID from the request and then specifies it as context information with “logging.LoggerAdapter()” method.
import logging

logger = logging.getLogger(__name__)

class Request:
    def __init__(self, user):
        self.user = user

class User:
    def __init__(self, id):
        self.id = id

def create_request():
    # Placeholder for creating a request object
    user = User(123)
    return Request(user)

def process_request(request):
    user_id = request.user.id
    adapted_logger = logging.LoggerAdapter(logger, {"user_id": user_id})
    adapted_logger.info("Processing request")

request = create_request()  # Assume this creates a request object
process_request(request)
That’s all from this effective guide related to logging in to Python.
Conclusion
Logging in Python is an essential tool for managing or capturing valuable information about the program execution. This enables developers to record messages to multiple levels, handle exceptions, and configure log destinations.
By implementing proper logging practices, you can enhance troubleshooting, performance optimization, and debugging.
Want to explore and learn more related to Python, do check out our dedicated Python Tutorial Series!
